Workflow Definitions in SonataFlow Dev UI extension
In the SonataFlow Dev UI extension, the Workflow Definitions page displays the list of available workflows in the Kogito project and helps you to start new workflow instances either via REST or by triggering cloud events.
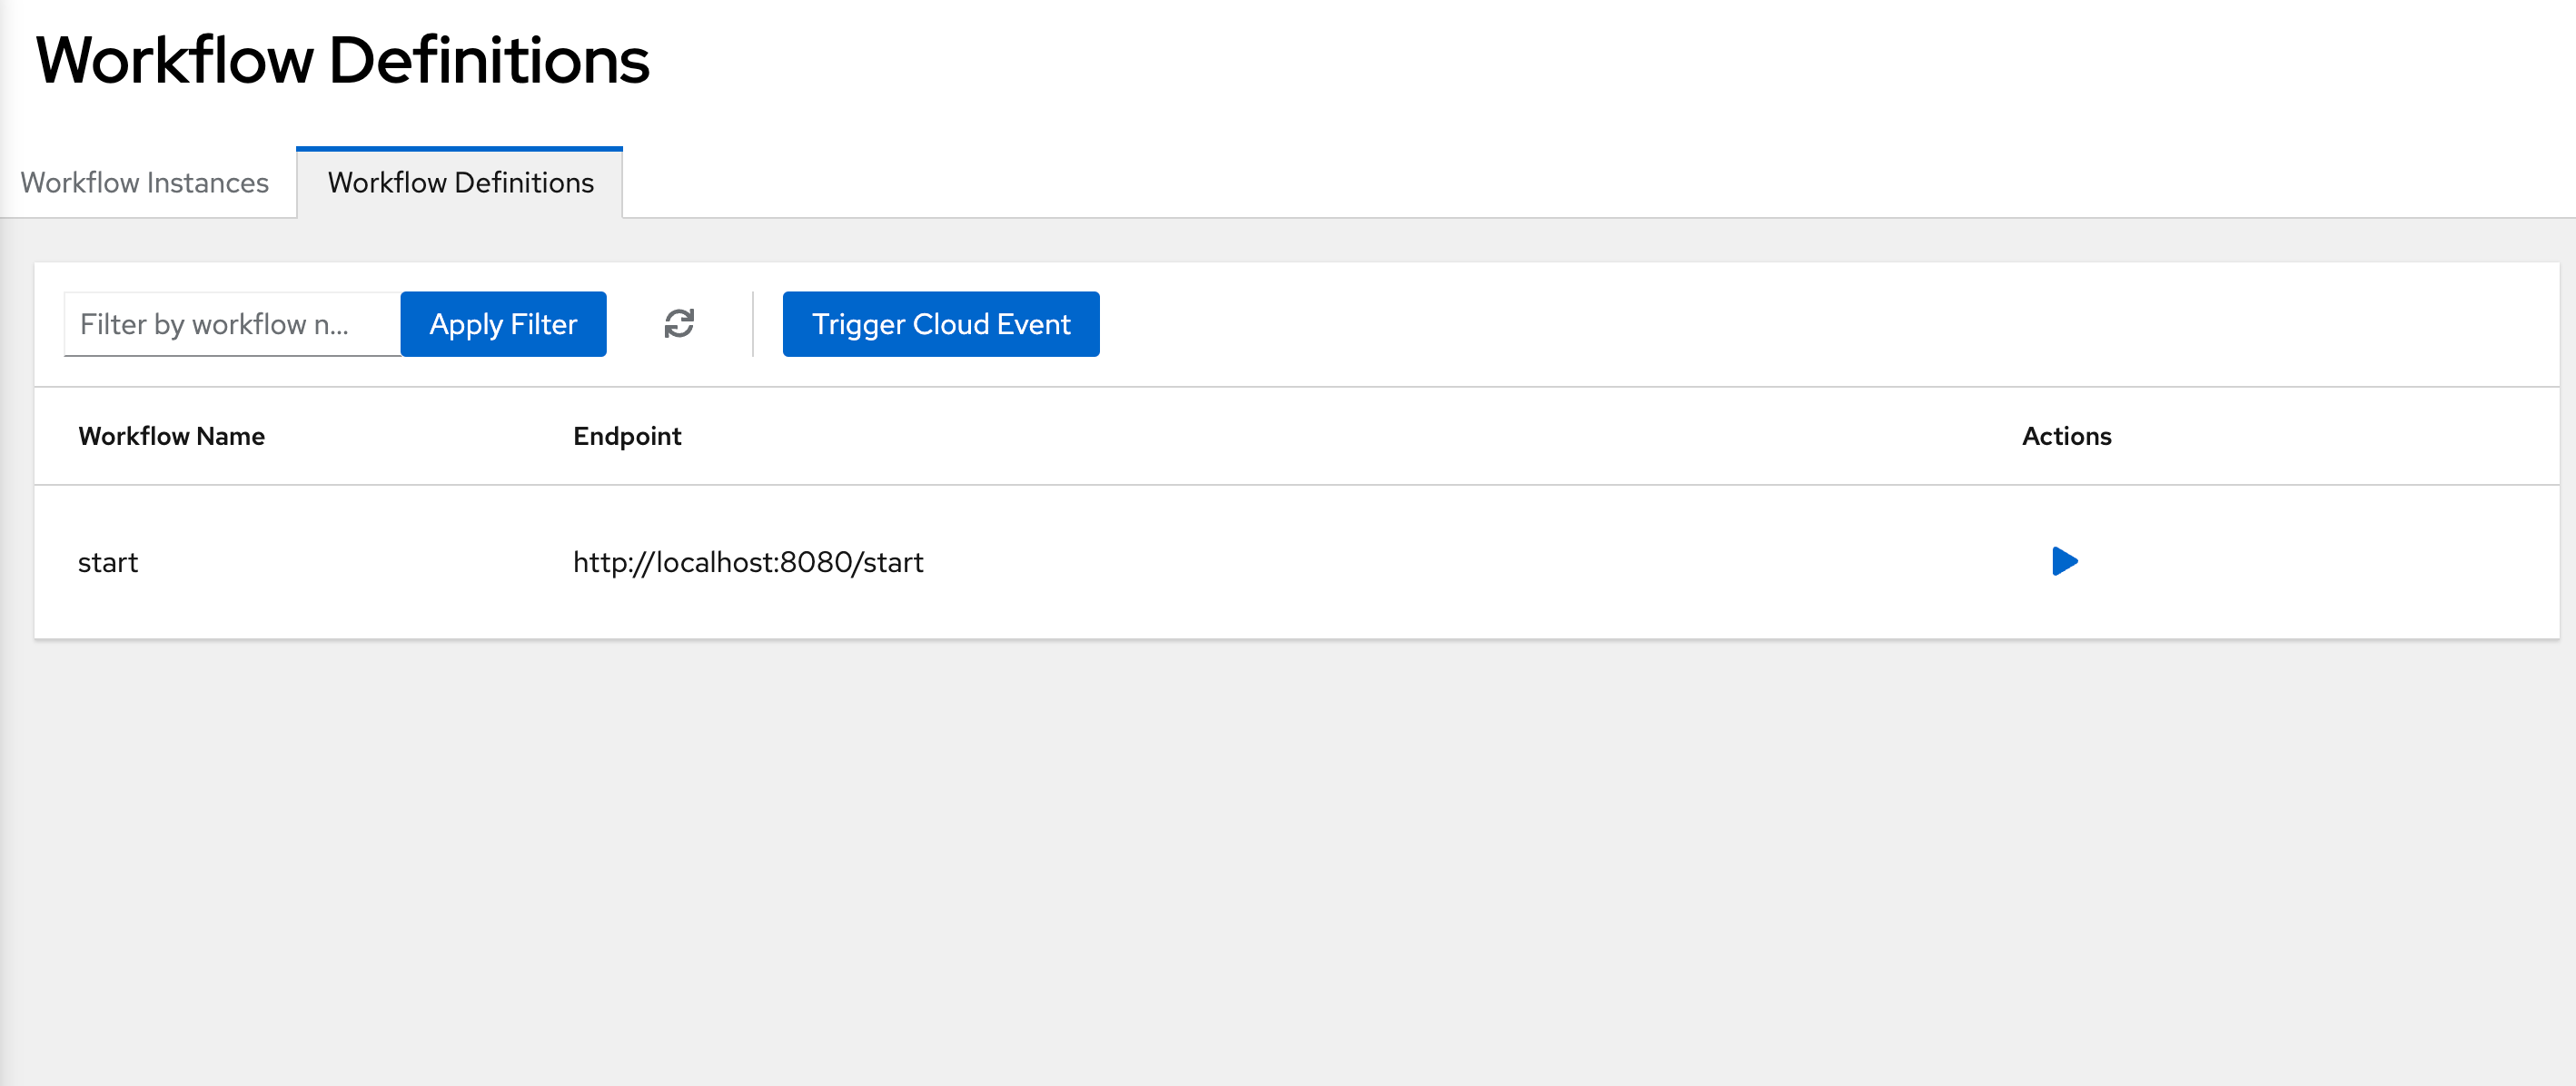
In the Workflow Definitions table you will find the list of workflows that shows the following details:
-
Workflow Name: Displays the name of a workflow definition.
-
Endpoint: Displays the URL to a workflow definition.
-
Actions: Provides the Start new Workflow button to start workflow instances via REST.
In the table, the toolbar provides the ability to apply filters to the table or to trigger cloud events that can start workflow instances
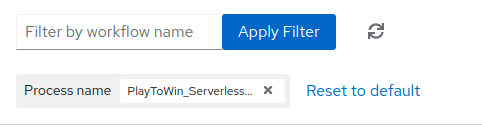
Applying filters to the Workflow Definitions table
-
To search for a specific workflow definition, enter the workflow’s name in the Filter by workflow name field.
-
Click the Apply Filter button. The matching workflow definitions appear as a chip below the search field.
-
Click the Reset to default button to clear the applied filters.
-
To fetch newly added workflow definitions, click on the refresh icon next to the Apply Filter button. Click the Apply Filter button. The matching workflow definitions appear as a chip below the search field.
To clear the applied filters, you can click the Reset to default button. Also, to fetch newly added workflow definitions, click on the refresh icon next to the Apply Filter button.
Starting new Workflow instances
Workflows can be started either by using the specific workflow REST endpoints or by triggering Cloud Events. The SonataFlow Dev UI extension allows you to use both mechanisms.
Starting new Workflow instances using REST
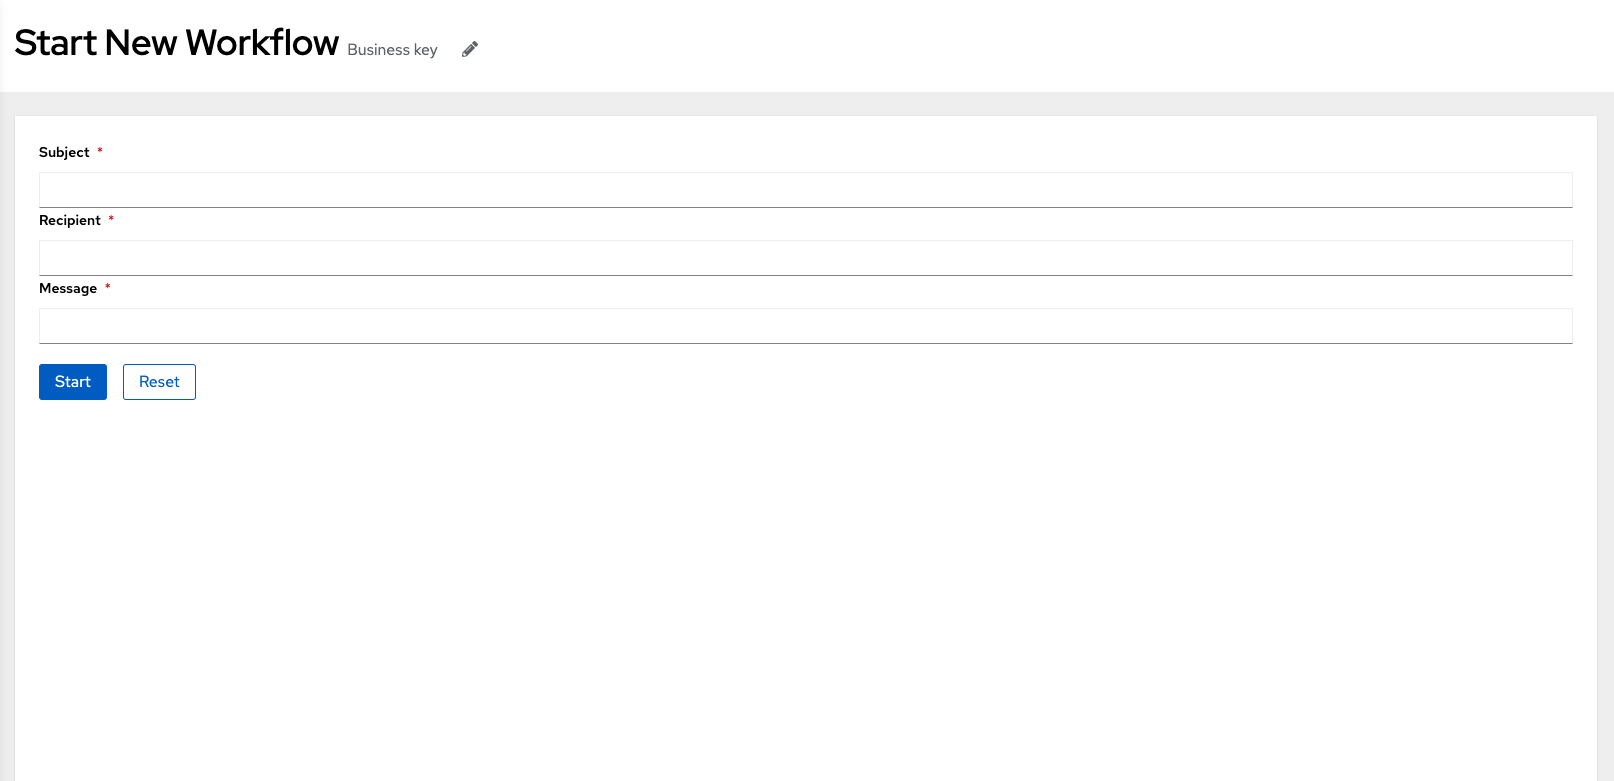
If you want to start a new workflow instance using the workflow REST endpoint, just click on the Start new Workflow button of any of the workflow in the Workflow Definitions table, then you’ll be redirected to the Start New Workflow page where you could setup the data and Business Key that will be used to start the new workflow instance.
Filling up the Workflow data
Depending on your workflow configuration the page can provide different mechanisms to fill the workflow data. If your workflow is configured with a valid Data Input Schema, this page will be able to display a custom Form to help a filling the data.
If your workflow does not provide a Data Input Schema, the page will display a Code Editor that will enable you to manually fill the workflow data in JSON format.

|
For more information about how to setup the Input Schema Definition on your SonataFlow, please take a look at the Input Schema for SonataFlow section. |
Setting up the Business Key
You can use the Business key text box to define a custom business key value to the workflow instance. If the Business Key field is blank, then an auto-generated business key is defined for the workflow instance.
Starting the new Workflow instance
By clicking on the Start button will POST the workflow data and the Business Key to the workflow REST endpoint. If the workflow instance starts successfully, a success alert appears on the top of the screen, which contains the Go to workflow list link to navigate to the Workflow Instances page.

If there is an issue while starting a workflow, then a failure alert appears on the top of the screen, containing the*View Details* and Go to workflow list options. The View Details enables you to view the error message.

Starting Workflows using Cloud Events
On the Workflow Definitions Page, the Trigger Cloud Event button enables you to start new workflow instances by using HTTP Cloud Events. This will lead you to the Trigger Cloud Event page.
Once there, you will have to fill out the form with the Cloud Event information:
-
Endpoint: Defines the Path and the HTTP method where the cloud event should be triggered.
-
Event Type: Sets the Cloud Event type header.
-
Event Source: Sets the Cloud Event Source header. Defaults to
/local/quarkus-devUi. -
Business Key: Sets the new workflow instance Business Key, it will be added in the
kogitobusinesskeyevent header. -
Event Custom Headers: Allows you to define custom headers to be added to the event.
-
Event Data: Data that will be in the event in JSON format.
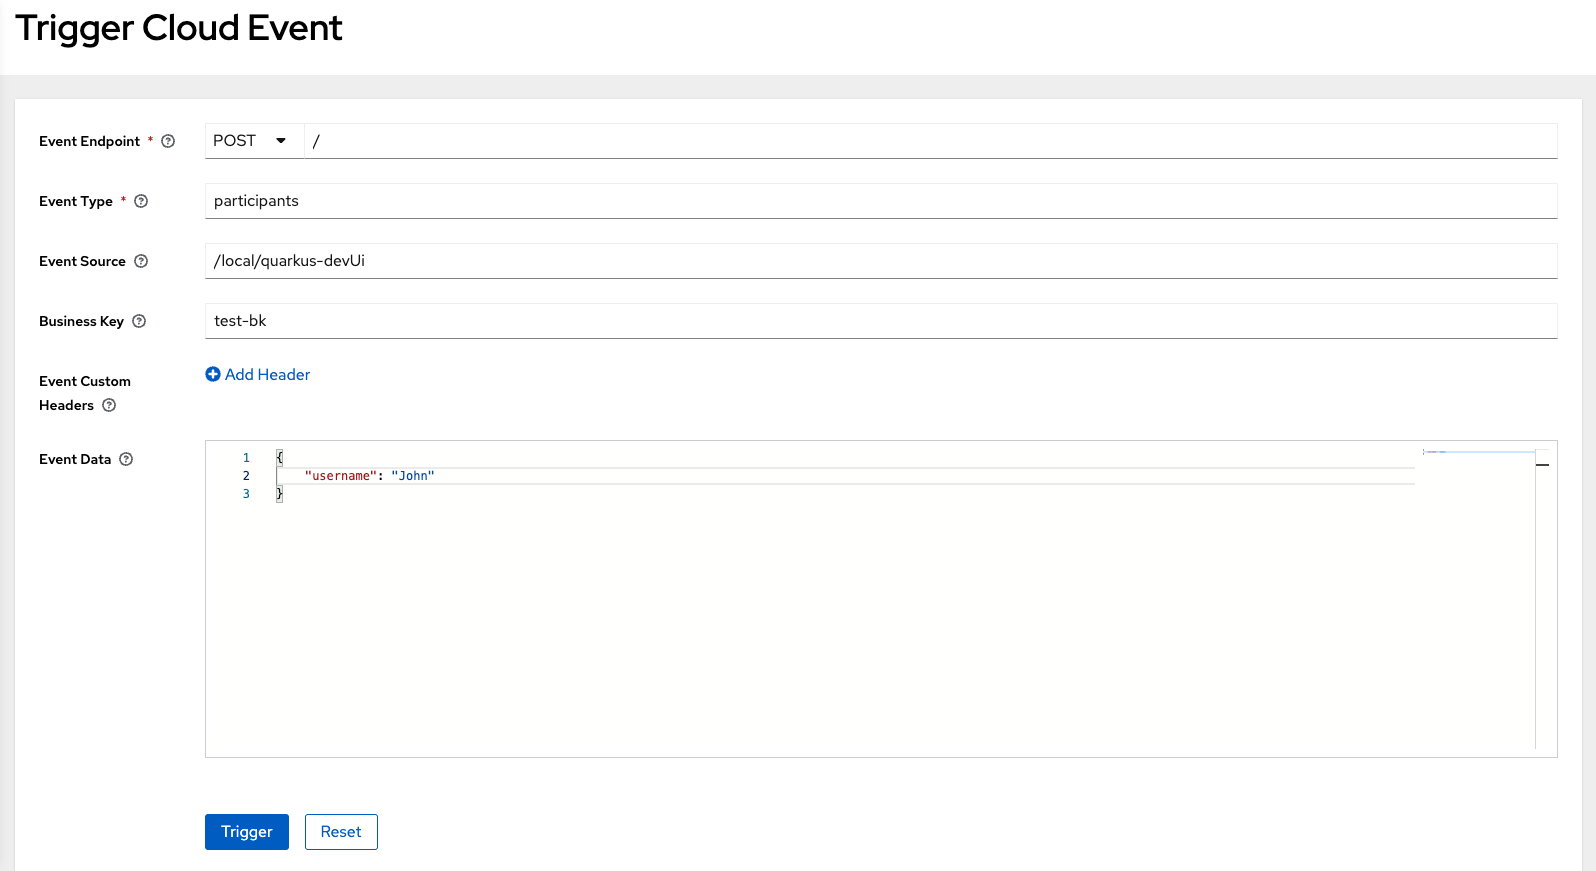
Click the Trigger button to trigger the cloud event. If the workflow instance starts successfully, a success alert appears on the top of the screen, which contains the Go to workflow list link to navigate to the Workflow Instances page.

If there is an issue while starting a workflow, then a failure alert appears on the top of the screen, containing View Details and Go to workflow list options. The View Details enables you to view the error message.

Found an issue?
If you find an issue or any misleading information, please feel free to report it here. We really appreciate it!